
HTML5 Tutorial:
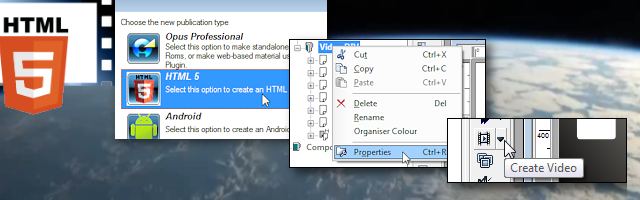
The first step is to create a new HTML5 publication and set the size of the page in Chapter Properties to suit your needs. In most cases you will be creating a publication which will be used a separate element of a larger web page, technically referred to as a DIV. Therefore you will want to set the Chapter Properties to suit the DIV size.
You may wish to set the page size to the same proportions as the video unless you are adding material outside the video such as navigation buttons as we have in the sample publication.
MP4 video is often 1280x720 but that is too big for most websites so you may prefer something like 800x450 or 640x360 and set the material to be resizable so it will resize if used in a responsive web page - see responsive content.
Draw the video object into place as you would any other object by clicking the video tool and click and drag on the page where you want the video to go. Resize and reposition as required or double-click and use the General tab of the Properties dialog to set the position and position exactly.
You do not need to create the video object at the same size as the original video but you should match the ratio of the video - so 1280x720 video could sit in a video object 800x450.
Use Browse to locate the video you want to use.

Remember that it must be MP4 format and that this will not preview in Opus (unless you have a Windows MP4 codec installed not simply Windows Media Player - these are often provided with video editing software).
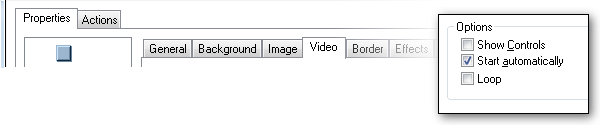
HTML5 video includes a set of playback controls by default but in this case we don't want the user to be able to skip through the video. We can turn these controls off using the checkbox on the Video Properties dialog and we need to the video to start automatically so we set that option on.
As your video will not show a preview image in the Opus editor you may wish to take a screenshot of a particular frame and then use that as the background image for the video object, or as a separate image object which can be deleted prior to the final publish.
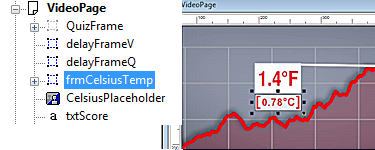
This technique can also be used to provide visual cues to position objects. In the sample publication we have used a screenshot of the temperature graph (CelsiusPlaceholder)...

Once your video is in place you can draw any other Opus object on top of your video exactly as you would with any other content (see creating content). Simply make sure anything you want to appear above the video is higher in the Opus Organiser Tree.
You can even use transparency effects and PNG images with alpha channels. In the sample publication we have provided a PNG graphic which is used to put a (rather cheesy) fiery border around the video for the first few seconds.
Note that these effects will only be apparent when published to HTML5 and will not work in the Opus preview.
In the example video provided the temperature increase is only shown in Fahrenheit. so we wanted to add a Celsius equivalent. Firstly we simply added a Text object and typed in the text we wanted. The text was coloured and formatted using the standard text formatting tools and that was placed in a frame (frmCelsiusTemp) with a Background colour to match the video annotation and we selected a Reveal Down for the Transition as this co-ordinates with the video transition used.

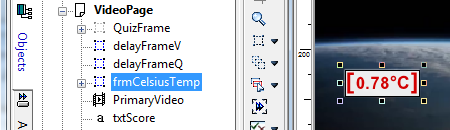
Take a screenshot of the relevant frame in the video using the Print Screen button or a paint program with a screen capture feature in. Place it as an image on your Opus page and, if necessary, use the Crop tool to remove any additional elements of your screen capture. Place the image at the same size and position as your video to use as a guide for placing the annotation. The annotation frmCelsiusTemp is then positioned accurately.

Finally, set the frame to be Initially Hidden so we can show it when required - as detailed in section 4 of this tutorial.

We have also included a simple quiz which appears over the video. It features two single-answer multiple choice questions created using the Question Object tool which we deal with in detail in the next part of the tutorial.
In addition to text and questions you might want to add arrows to highlight objects in the video, or buttons to launch other material including further episodes of video as in the Reptiland example. Invisible hotspots can also be used to make objects or areas in the video appear interactive.
Use the Path Animation or other animation options in Opus to have objects and hotspots follow elements in your video even as they change position.
In the next section we look in more detail at adding a quiz to a video.
how to create interactive HTML5 video with Opus Pro - tutorial part 2